
 A
Cry for Freedom!
A
Cry for Freedom! 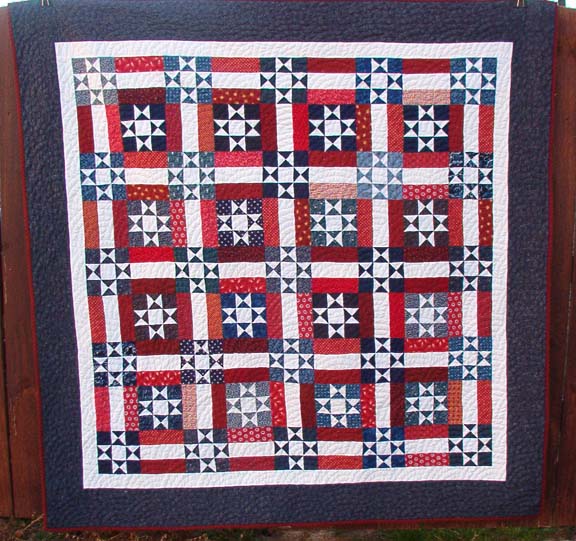
Finished Jan 5, 2006
Size: approx 69"X69"

"Let every Nation
know, whether it wishes us
well or
ill,
that we shall
pay any price, bear any burden, meet any
hardship,
support
any friend,
oppose any foe to assure the survival and the
success
of liberty."
~John F. Kennedy

Monday, September 17, 2001.
I woke up this morning with the NEED to stitch something patriotic. I can't explain this need, but many of you are also experiencing it. This is what came to my mind......White ohio stars on blue backgrounds, surrounded by red and white rail blocks.
My ohio stars are 6" finished size. I was concerned about making them any bigger, because then the rail blocks would have to be HUMONGOUS strips, and I didn't want them to over power the quilt. The easiness of the rail blocks makes up for the small pieces in the Ohio Stars, and it really does go quick.
Saturday, Sept 22, 2001:
Tuesday, Oct 30th, 2001:

If you would like to join me, here are the directions for the Ohio Star blocks.
For each star cut:
White:
TWO 3 1/4" squares. Cut these squares diagonally
twice
with an X to give you 8 star points.
ONE 2 1/2" square for the star center.
Navy:
TWO 3 1/4" squares. Cut
these squares
diagonally
twice
with an X to give you 8 star background triangles.
FOUR 2 1/2" squares for block corners.
Piece blocks in this manner:
Make four hour-glass squares:
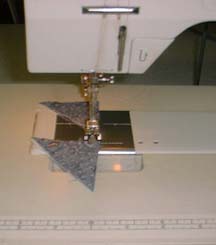
lay these out on your pressing board and press
the
seam
allowances to the DARK. trim points and snip threads between triangles.
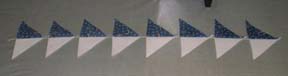
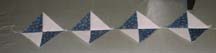
Make two piles of 4 triangles each.....and
place
them
with long sides facing eachother. Pair these up with right sides
together
to stitch them into hour glass squares. Trim threads between squares,
and
trim excess points.
Lay out all your star pieces to form the
block.....
Make
sure that your white points are forming the star points...and place
your
4 blue background squares in the corners, and the white square in the
center.

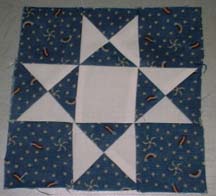
Stitch the block in rows across, as in sewing
a 9
patch
block.
Rail blocks:
Cut red fabric into 2 1/2" strips. Cut white center fabric into 2 1/2" strips.
Stitch a red on either side of the
white....pressing
seams
towards the dark.


Sub-cut these long strips into 6 1/2" rail
blocks.
Assembly:
Stitch blocks into rows, and then sew the rows into the quilt center.
Quilting Detail:

 Questions
or Comments? I would love to hear from you!!
Questions
or Comments? I would love to hear from you!! © Quiltville Custom Quilting 1997-2006 All Rights Reserved. No part may be used, copied or otherwise
altered without express written permission from the webmaster.