Patches & Pinwheels!

Block size: 6", Quilt size: approx 86"X86"
(this is after quilting and washing..and we all know about shrinkage!)
Quilt Retreats are perfect for
finishing UFOs that have
been lurking around! My former guild in North Augusta SC holds a
retreat at
Hickory Knob resort every January! Fun fun fun for 4 days and I finally
finished this 16-patch
& Pinwheels quilt in January 2004 that had sat about 1/2
finished for over a year!
I love how it turned out and gave it a place of honor on the antique
guest bed.
I had been working on these 16 patch blocks and pinwheel blocks during sit and sew days at the local quilt shop! I used 2" strips from the 2" strip bin in darks and lights to make the 16 patch blocks. The triangles were cut from 3.5" strips using the easy-angle ruler! I love this ruler...it works with the sizes of strips I like to keep on hand and I don't have to worry about adding that 7/8" to the finished size of the triangle to figure out what size to cut! This quilt was inspired by an antique quilt I saw on ebay.
To make this quilt you will need:
Assorted 2" strips separated into lights/darks
Assorted 3.5" strips separated into lights/darks.
For 16 patches:
Match a light 2" strip to a dark 2"
strip and stitch right sides together with a 1/4" seam. When you get to
the end of the strip pair, don't cut the thread, continue sewing onto
another pair until you have several pairs sewn in a long chain of
continuous piecing! Then take two pairs and sew them together, in
light/dark/light/dark fashion so you have several panels 4 strips wide.
Press the seams towards the dark fabrics. Square off the end of each panel, and sub cut into 2" sections.

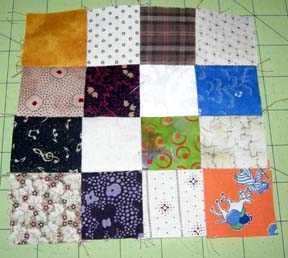
Arrange strips of squares as desired and stitch into 16 patch blocks!

Press the seams towards the dark fabrics. Square off the end of each panel, and sub cut into 2" sections.
Arrange strips of squares as desired and stitch into 16 patch blocks!
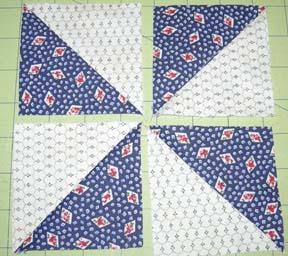
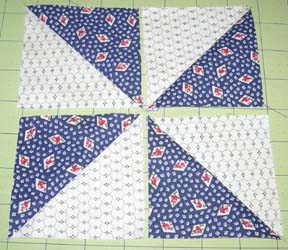
For each pinwheel, match a 3.5"
light strip right sides together with a 3.5" dark strip. Using
the
easy angle ruler, follow the 3.5" guide lines on the ruler to cut pairs
of matched triangles. Feed the triangles through your machine.
Press
them open towards the darker fabric and trim dog ears.
****NOTE****
The pinwheels change direction in
this quilt every other row! So I assembled this quilt one row at
a
time so I could get the pinwheels turning in the right direction!
Row A Row B
You will want to pay attention to which pinwheels go where. It adds a lot of motion to the quilt!
I also did about 4 different variations of pinwheels:
Version 1: All blades the same fabric as above.
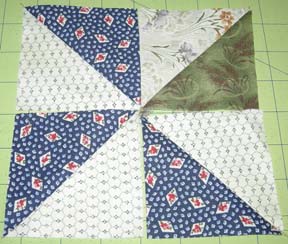
Version 2: 3 blades the same, with one "maverick" blade!
Version 3: two pairs of blades!
Version 4: all blades from the same color family, but all different fabrics!
Doing pinwheels this way added to the "vintage" feel of the quilt and helped me use up every triangle pair I had cut!
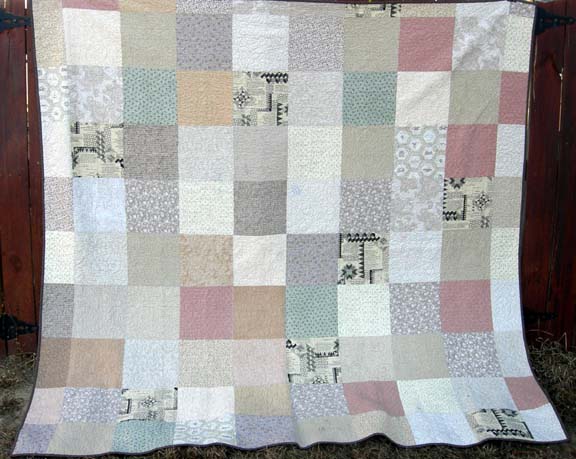
Close up of backing and quilting design!
If you make this quilt, I'd love to display your picture here!
Questions or Comments? I would love to hear from you!! Bonnie@Quiltville.com
© Quiltville Custom Quilting.All Rights Reserved. No part may be used, copied or otherwise
altered without express written permission from the webmaster.
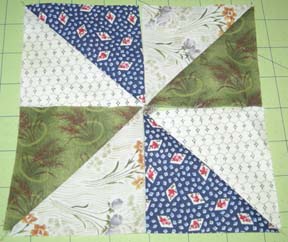
Row A Row B
You will want to pay attention to which pinwheels go where. It adds a lot of motion to the quilt!
I also did about 4 different variations of pinwheels:
Version 1: All blades the same fabric as above.
Version 2: 3 blades the same, with one "maverick" blade!
Version 3: two pairs of blades!
Version 4: all blades from the same color family, but all different fabrics!
Doing pinwheels this way added to the "vintage" feel of the quilt and helped me use up every triangle pair I had cut!
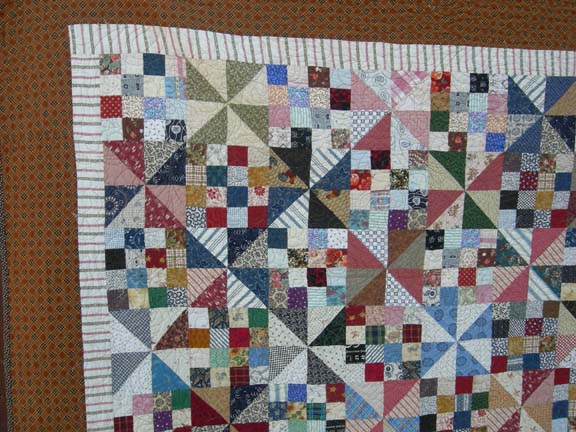
I laid out the blocks 13X13,
putting the
pinwheels in their right rows so they were spinning in opposite
directions every other row. I added a 2.5" cut inner border of a
shirting stripe, and added a 5" cut outer border of a diagonal plaid
that also added to the old time feel!
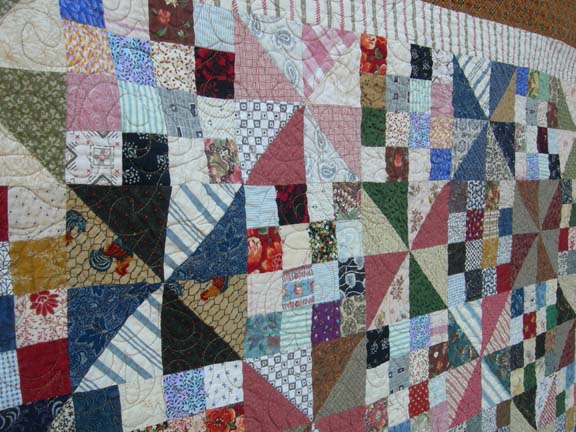
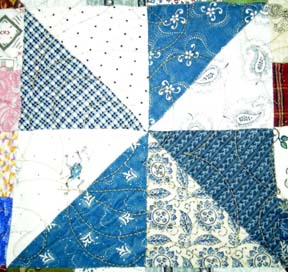
Close up of piecing and quilting! You can really see here how the different rows have pinwheels going opposite ways!
Close up of piecing and quilting! You can really see here how the different rows have pinwheels going opposite ways!
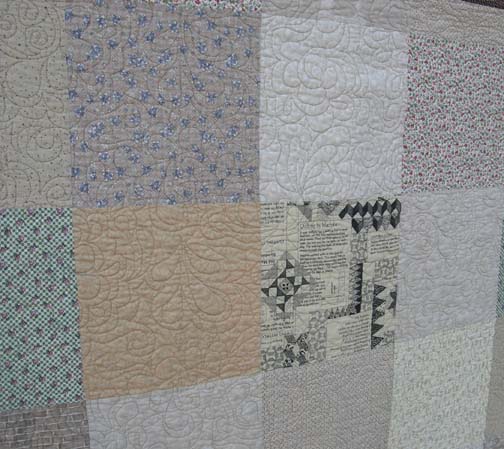
I
used up lots of 10.5" squares of neutrals in a fun
pieced backing that cleaned out a lot of stash I didn't want
anymore!
Close up of backing and quilting design!
If you make this quilt, I'd love to display your picture here!
Questions or Comments? I would love to hear from you!! Bonnie@Quiltville.com
© Quiltville Custom Quilting.All Rights Reserved. No part may be used, copied or otherwise
altered without express written permission from the webmaster.