
This block is traditionally known as 'Road to Oklahoma'
but since I reversed the placement of the lights and darks,
We are taking the backroads with our scraps!
After finishing my Scrappy Sister's Choice Quilt, I still had lots of leftover 2 1/2" squares and strips,
And I still felt compelled to do something more to deplete them! Along with the strip bins Ive got....I have a few stackable
drawers with"small junk"...good sized pieces that wouldn't really be long enough for a strip, but still good chunks of stuff...
left over setting triangles, bigger pieces left from other quilts, partial borders (pieces maybe 5" X 7" for example)...
Also in there were all the other bazillion leftover y2k swap charm squares...I finished my Millenium Quilt a while ago,
but I swear I swapped enough 3" squares for 5 quilts. And...very FEW of the squares are a true 3"
which is why they sat for so stinking long. I didn't know what to do with them.
Since there are alot of single 2 1/2" squares in each block for this quilt, I decided to bite the bullet and trim down all those
remaining y2k charm squares, and the other little pieces into 2 1/2" squares or 2 1/2" X 4 1/2" rectangles.
I also started a bin of 2" scrappy squares to use as leader/enders for four patches when starting and stopping chain piecing.
I love how this cuts down on the thread waste, and tangled thread ends everywhere. Freebie 4 patches are alot of fun!
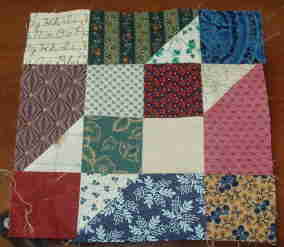
Oklahoma Backroads Block:
Here we go!
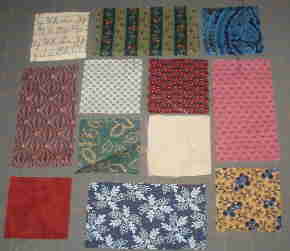
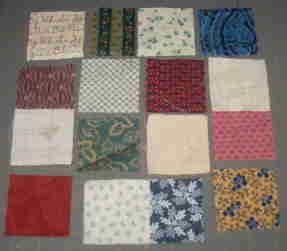
For each 8" block you will need:
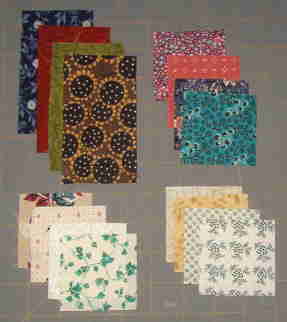
(4) 21/2" X 4 1/2" DARK rectangles
(4) 2 1/2" X 2 1/2" DARK squares
(8) 2 1/2" X 2 1/2" LIGHT squares.
Some of my 'darks' are more medium in nature...but I like the look it gives the quilt..
as long as the darks contrast from the lights enough to tell which is which...
Layout:
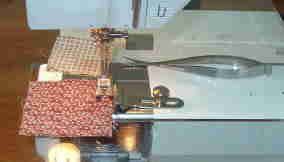
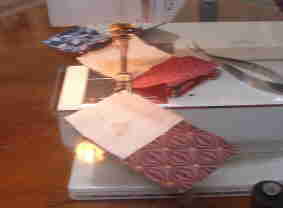
The first pic above shows the 4 dark rectangles with two diagonal chains of 4 squares each:
Darks going from the bottom left to top right, Lights going from the top left to bottom right.
Color value placement is really important. All the blocks must have lights/darks in the same order so your chains will go the right way when you twist and turn your blocks into the quilt layout.
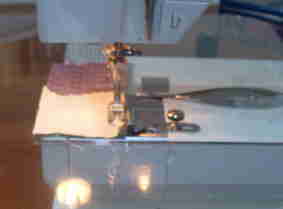
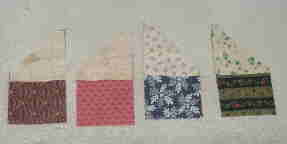
The second picture..is the EXACT SAME, only I have taken 4 light 2 1/2" squares and placed them upside down on top of each rectangle where they will be sewn into the star points.
This is where the tricky part comes...because the top/bottom rectangles will have the light squares sewn corner to corner in one direction, but the right and left side rectangles will have their squares sewn on the diagonal in the opposite direction. You need two 'uphill' peaks and two 'downhill' peaks. I'll show you what I mean as we start sewing!
Chain piecing this block:
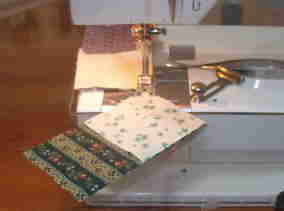
Start by taking the pairs of squares that make the 4 patch center of the block...right sides together, stitch the top two 4 patch squares, and without cutting the thread, run the second pair through as well. You can see the little 2" squares that I am using for leader/ender squares behind the presser foot. This solves so much thread waste and tangling...I use the spring snips to snip between the chained pieces. Still do not break the thread! (at this point I loosen my seam guide and swing it out of the way because we are going to do the diagonal corners now....
Start with the top rectangle..align the square on top of it as shown, and sliding it under the foot at the angle shown above, stitch from corner to corner across the light square. If it helps you, you can draw a pencil line first so you have a line to sew on. I just aim and shoot!
Now take the BOTTOM rectangle that has the square aligned in the corner...without moving the square out of place, turn it so it is aligned at the same angle as the first rectangle you just sewed...stitch corner to corner.
Now for the side rectangles:
The side rectangles need to have the triangles sewn on in the opposite angle. So take a side rectangle, leaving the square where it is placed, and angle it the opposite way as shown above. Stitch from corner to corner. Repeat with last remaining rectangle, having it angle the same way as the previous one. You will have the top and bottom slanting one way, the right and left sides slanting the opposite way.
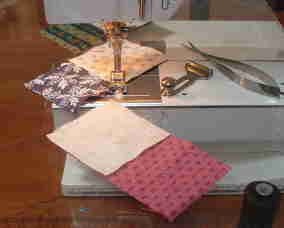
After this last rectangle is sewn....I slip another pair of 2" leader/ender squares through the machine and clip the threads just behind the presser foot at the last rectangle.

Clip between all units, and trim the excess seam allowance on the rectangles....
The second picture above shows the rectangles after trimming...two uphill, and two down hill!
Press the seams towards the light triangles.
Here they are pressed:

At the beginning of your chain piecing you also had the two halves of your center 4 patch! Press these seams towards the dark, place right sides together and stitch the center seam. Press the 4 patch center...
Once this is done, we can lay out the whole block so it is ready for assembly:

Now is it making sense why we needed to have the side rectangle's triangles opposite than the top and bottom rectangle's triangles?
This way the triangles can point in towards each other Giving that nice diagonal look to the block.
It might be a bit tricky to lay this out, so watch your placement carefully.
Also watch the placement of which way your lights/darks are going in the center 4 patch.
Keep the lights going one way, and the darks the other!
Assemble pieces into rows, and stitch rows together to complete one block:
I am having fun with these blocks! And there is more than one way to lay them out...try straight furrows..
.or lay them out traditionally like I have here....16 blocks on the floor so far!
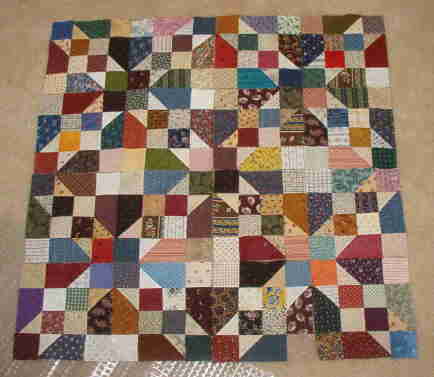
I'm not sure how big I'm going to make this quilt....all I know is I have shoeboxes full of 2 1/2" squares in lights and darks, and another shoebox of dark 2 1/2" X 4 1/2" rectangles...all from my scraps! I'll just keep making blocks until I can't make anymore and it is big enough for someone's bed. *Ü*
Questions or Comments? I would love to hear from you!! Bonnie@Quiltville.com
© Quiltville Custom Quilting.All Rights Reserved. No part may be used, copied or otherwise
altered without express written permission from the webmaster.