


Powered by


Quiltville
Custom Quilting
http://www.quiltville.com
It's Layout Time!

Whooowhoooo!
http://www.quiltville.com
Double
Delight!
~A Quiltville Mystery Quilt~
©Bonnie K Hunter
2008
Part 6!
(Click here
for printer friendly version)

It's Layout Time!
Whooowhoooo!
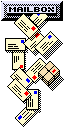
My
quilting room doesn't have great layout space..it's long and narrow,
and no room for a design wall..so here you get to see what's on my
floor...oh, I love that roomba! It's great for keeping threads and
snips off my floor.
Lay out your blocks as shown. See how they play together. I did some rearranging so that I didn't have the same pink of a 9 patch right up against the same fabric where it meets another 9 patch,but that's about it.
It's time to cut setting triangles!
Side Triangles:
Cut 5 14" squares from various pinks. Cut squares twice on the diagonal with an X. These are your side triangles, there will be 20 of them, and you only need 18 of them. Two will be bonus. However, you can't use them for the corners because the outside edge will be on the bias.
Corner Triangles:
Cut 2 7 1/4" squares. Cut once from corner to corner giving you 4 corner triangles.
Lay the corner triangles and the side triangles in with your blocks in a manner that pleases you.

Stitch the quilt in rows, beginning in the upper
corner. Press seams TOWARDS the setting triangles, and towards the
double 9 patch blocks. I join the rows making the quilt in two
halves..and then sew the two halves of the quilt center together. It is
easier for me to handle this way. Here you can see the upper half
pieced and pressed...the bottom half is still laying there waiting it's
turn :c)

Quilt Center measures 63 3/4" X 76 1/4" before borders.
But before I add borders, I need to do some trimming up.

Lay out your blocks as shown. See how they play together. I did some rearranging so that I didn't have the same pink of a 9 patch right up against the same fabric where it meets another 9 patch,but that's about it.
It's time to cut setting triangles!
Side Triangles:
Cut 5 14" squares from various pinks. Cut squares twice on the diagonal with an X. These are your side triangles, there will be 20 of them, and you only need 18 of them. Two will be bonus. However, you can't use them for the corners because the outside edge will be on the bias.
Corner Triangles:
Cut 2 7 1/4" squares. Cut once from corner to corner giving you 4 corner triangles.
Lay the corner triangles and the side triangles in with your blocks in a manner that pleases you.
Quilt Center measures 63 3/4" X 76 1/4" before borders.
But before I add borders, I need to do some trimming up.
Oops, forgot the date stamp
on that pic! Oh well. I use my large 15" omnigrid ruler for this
step. You'll need a large table surface, and I find it helpful to
have some books or something to weight the quilt in places so it
doesn't slide off the table. Using the 1/4" line as a guide, line it up
from block corner to block corner, leaving yourself a good 1/4" seam
allowance on the outside edge of the quilt center. Trim. It might be
just a sliver, but that sliver needs to GO! Also be sure when you trim
that your corners get a good square angle.
At this point, you can choose to border as you desire, quilt as is and finish it off with a nice brown binding, or stay tuned to see what I do for the option borders coming next!

At this point, you can choose to border as you desire, quilt as is and finish it off with a nice brown binding, or stay tuned to see what I do for the option borders coming next!
As always, my studio is
full of little helpers so eager to get their paws in on the process too!
Click HERE for part 7, The FINALE!
Click HERE for part 7, The FINALE!
 Questions
or Comments? I would love to hear from you!!
Questions
or Comments? I would love to hear from you!! © Bonnie K Hunter & Quiltville.com 1997-2011 All Rights Reserved. No part may be used, copied, sold, distributed or otherwise
altered without express written permission from the author/webmaster.