http://www.quiltville.com
 Border Hints &
Tricks!
Avoiding the wave and ripple!..
(Click here for printer-friendly version)

Lessons in How NOT to create a quilting nightmare! :c)
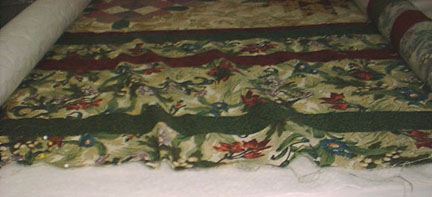
Believe me, this will NOT quilt out!
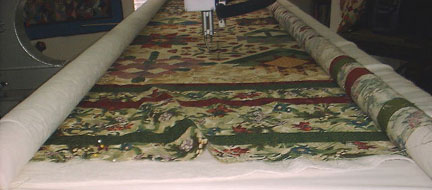
THIS was a quilting nightmare! The names have been changed to protect the quilty-guilty! I hope the steps below will help you apply borders that lie flat and give you square corners :c)

 It's not really a
trick..I've always thought of it as a *cheat*...because I
don't use measuring tapes or rulers..
 To
join on the
diagonal or not? It is up to you! I will join on the diagonal for
narrow borders, anything up to 3.5" like this:
 When strips get wider
than 3.5", I
like
to sew them together straight end to end instead of on the
diagonal or bias. This is mostly due to the fact that a bias seam is
going to be longer than a straight seam, and because the strip is wide,
it will be even more noticeable. There is also a lot of waste when you
are joining wide strips on the bias. What are you going to do
with a bunch of triangles you trimmed from joining 6" borders on the
diagonal? You are going to need more yardage for more border strips if
you do this because you are losing that 6" triangle at either end of
your strips. That adds up! Other things to take into consideration....a
seam on a stripe fabric is less noticeable if it is a straight seam,
insead of a diagonal seam. The same thing goes for bigger plaids, which
can look way off if you join them on the diagonal. I tend to join
stripes and plaids straight end to end for these reasons. The
choice is up to you!
 Lay out the quilt on the floor,
smoothing as you go so it is straight and flat, but do not stretch...just
let it lay flat. Now take your
border strip and lay it down the CENTER of the quilt, top to bottom, just smoothing it out. DO NOT STRETCH,
just smooth, smooth. Trim it off at the bottom of the end of the quilt. I lay
my quilt out on carpet, so I also like to anchor the beginning end of
the borders with a couple of long pins stuck into the carpet. It keeps
that one border end from creeping as I smooth. Cut the second strip the
same way.
Lay out the quilt on the floor,
smoothing as you go so it is straight and flat, but do not stretch...just
let it lay flat. Now take your
border strip and lay it down the CENTER of the quilt, top to bottom, just smoothing it out. DO NOT STRETCH,
just smooth, smooth. Trim it off at the bottom of the end of the quilt. I lay
my quilt out on carpet, so I also like to anchor the beginning end of
the borders with a couple of long pins stuck into the carpet. It keeps
that one border end from creeping as I smooth. Cut the second strip the
same way.If you are doing a rectangular quilt with 4 cornerstones, also cut your top and bottom borders across the width of the quilt, measuring through the center before sewing on the side borders.

 Sew your borders to the long
sides of the quilt first, pinning
the centers and the ends and
easing where neccessary. If the border seems bigger than the quilt top, stitch the border to the
quilt with the border against the feed dogs. If the quilt seems a bit
bigger, then sew that on with the quilt next to the feed dogs to ease it
in a bit.
Sew your borders to the long
sides of the quilt first, pinning
the centers and the ends and
easing where neccessary. If the border seems bigger than the quilt top, stitch the border to the
quilt with the border against the feed dogs. If the quilt seems a bit
bigger, then sew that on with the quilt next to the feed dogs to ease it
in a bit.Why side borders first?
For me it is a personal preference :c)
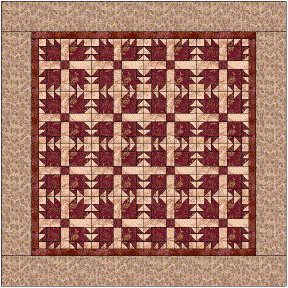
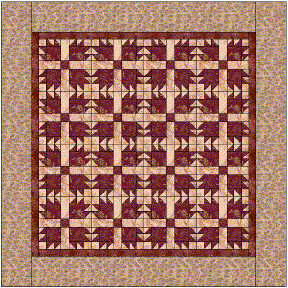
It's a subtle difference, but look at the two identical quilts above. Which is more pleasing to you?

 Now for
your top and bottom borders! Back to the floor...lay the quilt out... smoothing
smoothing....and lay the border
strips across the center of the quilt (including the borders you just
added) from side to side. Trim evenly. Pin centers and ends and ease where
neccessary as for side borders.

 Things to remember!
 Measure through the quilt CENTER ONLY.
DO NOT STRETCH!
 Problem: The quilt top is
slightly longer than
the border.
  Solution: Sew with the quilt
top on the bottom,
when
you put it through the sewing machine.
Your sewing
machine’s feed dogs
will help resolve the problem by easing in the excess fabric.
  Problem: The borders are slightly
longer than the quilt top.
 Solution: Sew the border on with
the
border fabric next to feed dogs underneath the quilt.
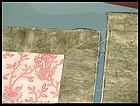
 Measure the quilt in both
directions through quilt center to calculate a “base” measurement
for each border.
Measure the quilt in both
directions through quilt center to calculate a “base” measurement
for each border.If your main quilt center is 36" and the border is 2" wide,you must add another 2" on EACH side for the miter. The math would look like this:
miter + border width + body of quilt + border width + miter + seam allowance.
(the seam allowance is 1/2", which is 1/4" on each side and needs to be added only ONCE for the entire piece)
2" + 2" + 36" + 2" + 2" + 1/2" seam allowance = 44 1/2"
If you
think of it in small steps, one section at a time, it is not difficult
at all. I actually draw myself a little sketch, adding each
border, and then I can visually SEE that there need to be TWO sets of
numbers added, one for each side.
 Find the center point in the length of
the border. Now working out from the center, mark half the “base
measurement” length in both directions. You should have a "tongue" left
over at each end which is equal to the extra that you have allowed for
the miter.
Find the center point in the length of
the border. Now working out from the center, mark half the “base
measurement” length in both directions. You should have a "tongue" left
over at each end which is equal to the extra that you have allowed for
the miter.Mark quarter points on the border and divide quilt edge into half way point and quarter points.
Stitch border to quilt matching quarter and half way points. Be sure to start and finish seam exactly ¼" from the raw edges.
 Stitch one of the adjacent borders onto
the quilt in the same manner, remembering to pin first border excess
well out of way before adding the next border.
You can stop here and make a miter before continuing to add the other sides or you can wait until all 4 sides are added and then miter all four corners at once. That is up to you.:
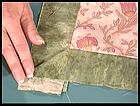
To
make a miter:
-
Fold the quilt in half diagonally so that the right sides are together
-
Pin match the seams so that they are aligned together.
-
Use the 45° angle line, marked on your ruler, to pencil a 45° stitching line from the corner of the quilt to the raw edge of the border.
-
Be sure to start the line exactly at the spot where the border stitching finished otherwise you will end up with a pleat. Do not stitch beyond the seam allowance and into the quilt body! Stitch on the pencil line.
- Lay quilt corner out flat, right sides up so you can
check it out.
-
Line up the 45° angle line of ruler as well as the other lines over miter seam to be sure the corner is square. This is where you can undo and re-do if the seam is not right.
- Trim excess fabric and press seam open


